 Save to Pinterest
 My friend Marco brought over a block of extra-firm tofu one Tuesday evening, challenging me to prove that vegetarians could enjoy the same crispy, cheesy comfort food he'd grown up eating. I spent that night experimenting in my kitchen, layering Asiago onto golden breadcrumbs and watching marinara bubble around melted mozzarella, and honestly, when he took that first bite, the look on his face made me realize I'd stumbled onto something special. This dish has since become my go-to when I want to feed people something that doesn't announce itself as a meat substitute—it just tastes like pure indulgence.
I made this for my sister's dinner party last spring when she casually mentioned she'd gone vegetarian, and I was determined not to serve her the sad pasta side dish everyone else dreads. Watching the mozzarella bubble and brown through the oven window, I felt oddly confident—and when she came back for seconds before everyone else had finished their first plate, that quiet nod of approval meant more than any review.
Ingredients
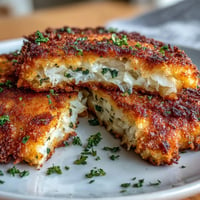
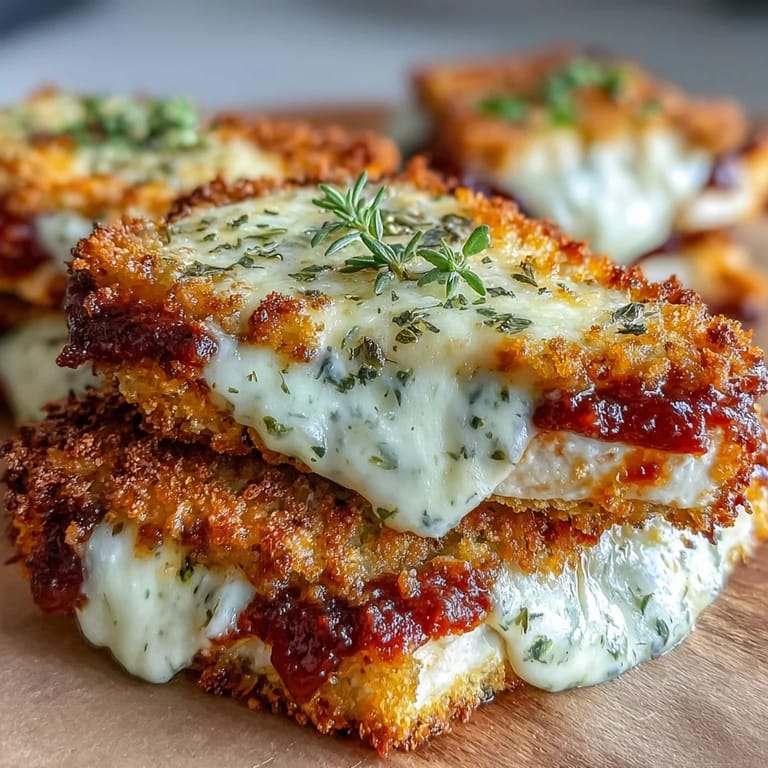
- Extra-firm tofu, pressed and sliced into ½-inch slabs: Two 14 oz blocks work perfectly; pressing them for at least 15 minutes pulls out moisture that would otherwise steam the coating instead of crisping it.
- Panko breadcrumbs: One cup gives you that signature crunch; regular breadcrumbs will work but won't deliver the same satisfying texture.
- Asiago cheese, grated: Three-quarters cup mixed into the breadcrumbs creates a savory, slightly salty crust that's the real star here.
- Dried Italian herbs, garlic powder, salt, and black pepper: These simple seasonings (1 tsp, ½ tsp, ½ tsp, and ¼ tsp respectively) build a flavor foundation that plays beautifully with the cheese.
- All-purpose flour: Half a cup acts as the adhesive that helps everything stick together during breading.
- Beaten eggs: Two large eggs bind the flour to the breadcrumb coating, creating a crispy shell.
- Marinara sauce: Two cups of your favorite store-bought or homemade sauce; I've learned not to skimp here because it's what keeps the tofu moist underneath.
- Shredded mozzarella cheese: One cup melts into creamy pockets throughout the baking dish.
- Grated Parmesan cheese: A quarter cup optional but recommended for extra depth and a subtle tang.
- Fresh basil leaves: Added at the end for brightness and that unmistakable Italian aroma.
Tired of Takeout? 🥡
Get 10 meals you can make faster than delivery arrives. Seriously.
One email. No spam. Unsubscribe anytime.
Instructions
- Preheat and prep your workspace:
- Set your oven to 400°F (200°C) and line a large baking sheet with parchment paper or lightly grease a baking dish. Having everything ready before you start means you won't rush through the breading step.
- Press the tofu until it surrenders its water:
- Place each 14 oz block between layers of clean kitchen towels or paper towels, then weight it down with something heavy—I use a cast-iron skillet—for at least 15 minutes. The drier your tofu, the crispier your final result will be; I learned this lesson the hard way after making soggy batches early on.
- Set up your breading station:
- Arrange three shallow bowls in a line: flour in the first, beaten eggs in the second, and a mixture of panko, Asiago, Italian herbs, garlic powder, salt, and pepper in the third. This assembly-line approach keeps things clean and efficient.
- Bread each tofu slice with intention:
- Coat each slice in flour, shaking off excess, then dip into egg, and finally press firmly into the breadcrumb mixture, making sure all sides get covered—don't be timid here, as a generous coating is what gives you that golden, crunchy exterior.
- Arrange and crisp on the first bake:
- Place your breaded tofu pieces on the prepared baking sheet, lightly spray or drizzle with olive oil, then bake for 20 minutes, flipping halfway through. You're aiming for golden brown and crispy, which should take about 10 minutes per side.
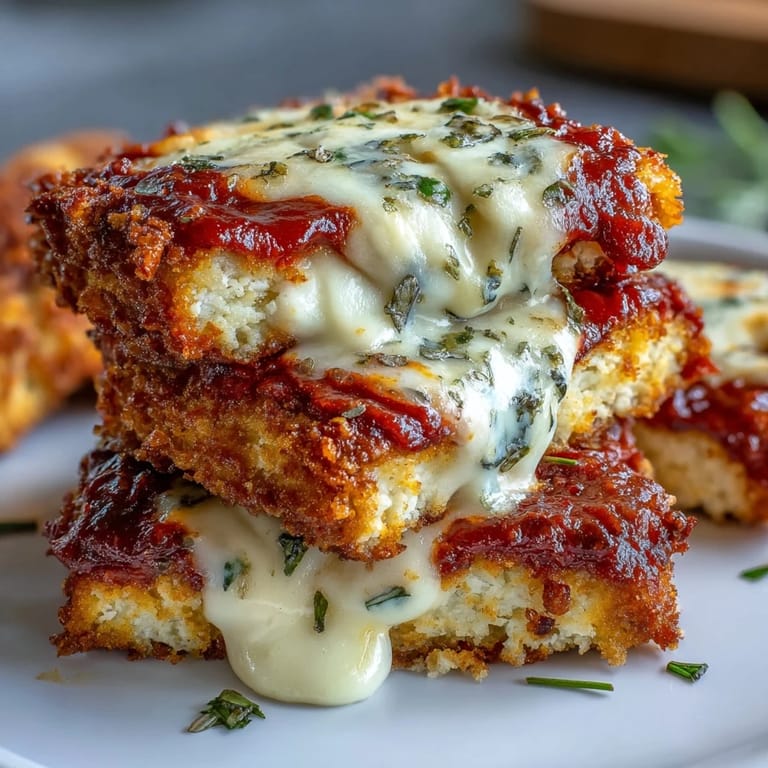
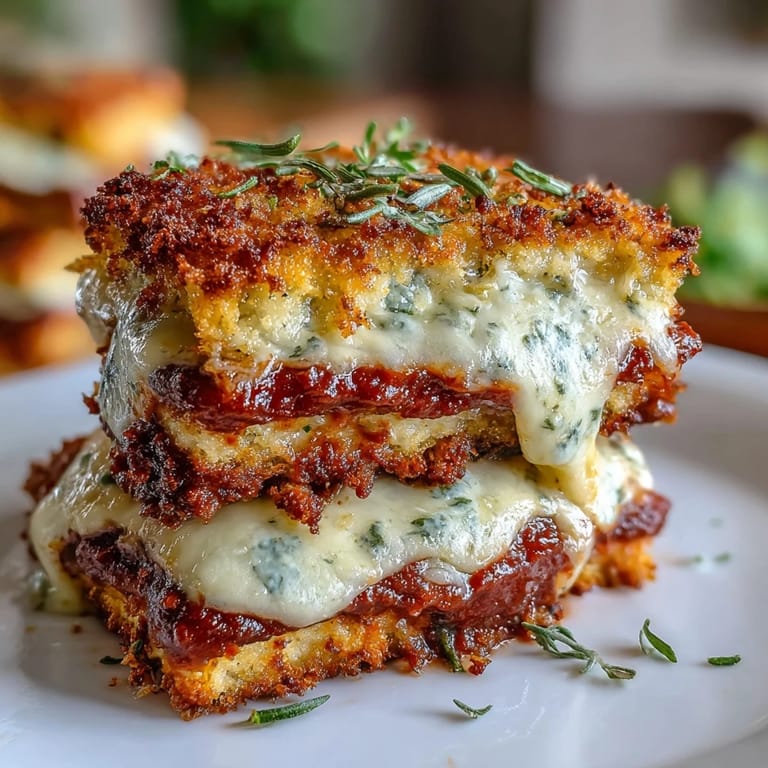
- Add sauce and cheese for the final transformation:
- Remove the tofu from the oven, top each piece generously with marinara sauce, then scatter mozzarella and Parmesan (if using) over top. Return to the oven for 8 to 10 minutes until the cheese is melted and the sauce is bubbly around the edges.
- Finish with fresh basil and serve:
- Garnish with torn fresh basil leaves while everything is still hot, then serve immediately over spaghetti or with crusty bread if you'd like.
 Save to Pinterest
 There's a moment near the end of cooking when the cheese starts bubbling at the edges and the aroma fills your entire kitchen, and that's when this dish stops being about vegetarian options and starts being about pure comfort. My partner used to joke that he could smell this from three rooms away, and somehow it always meant dinner would be ready soon.
Why Asiago Makes All the Difference
When I first made this dish, I reached for Parmesan out of habit, but the Asiago—with its nuttier, slightly more complex flavor—transformed everything. It adds a savory depth to the crust that keeps people from missing the chicken entirely, and there's something about its texture in the breadcrumb mixture that crisps up differently than other cheeses. Once you taste it with Asiago, you'll understand why I'm particular about this choice.
The Art of the Perfect Crust
The crispy exterior is what separates this from ordinary baked tofu, and it comes down to three things: pressing your tofu until it's truly dry, not skipping the oil before baking, and respecting the flip at the halfway point. I've learned that turning up the heat slightly (some ovens run cool) helps achieve that beautiful golden-brown color without burning the cheese. The sound of a fork pressing into that crust is something I listen for now—a tiny confirmation that everything worked as planned.
Customization and Serving Suggestions
This dish adapts beautifully to what you have on hand or what you're in the mood for. I've experimented with adding a pinch of red pepper flakes for heat, swapping in Pecorino Romano when Asiago wasn't available, and even preparing a vegan version for friends by using non-dairy mozzarella and a plant-based milk mixed with flour instead of eggs. It pairs wonderfully with a simple green salad on the side and tastes even better the next day, reheated gently in the oven.
- Try serving it over spaghetti tossed with a little extra marinara for a complete Italian-American experience.
- A light red wine like Chianti complements the rich cheese and tangy sauce beautifully if you're in the mood for something special.
- Leftover slices make surprisingly good sandwiches on crusty bread the next day.
 Save to Pinterest
 This is the dish that changed how I think about vegetarian cooking—not as a limitation but as an opportunity to make something genuinely delicious. I hope it becomes one of your kitchen wins too.
Recipe FAQs
- → Why is pressing the tofu important?
Pressing tofu for at least 15 minutes removes excess moisture, allowing the coating to adhere properly and creating a firmer, meatier texture that better replicates the experience of traditional chicken Parmesan.
- → Can I make this gluten-free?
Absolutely. Substitute regular panko breadcrumbs and all-purpose flour with their gluten-free counterparts. The coating technique remains exactly the same, and you'll still achieve that satisfying crispy exterior.
- → What cheese works best for the coating?
Asiago provides excellent flavor and melting properties, but you can substitute with Parmesan or Pecorino Romano depending on your taste preference. Each adds a slightly different salty, nutty dimension to the crust.
- → How do I store leftovers?
Store cooled portions in an airtight container in the refrigerator for up to 3 days. Reheat in a 350°F oven for 10-15 minutes to restore crispiness. Avoid microwaving as the coating will become soggy.
- → Can I freeze these before or after baking?
You can freeze breaded tofu slices before baking—place them on a parchment-lined sheet until firm, then transfer to freezer bags. Bake from frozen, adding 5-10 minutes to the initial baking time. Already-baked portions don't freeze as well due to the sauce and cheese.