Save to Pinterest
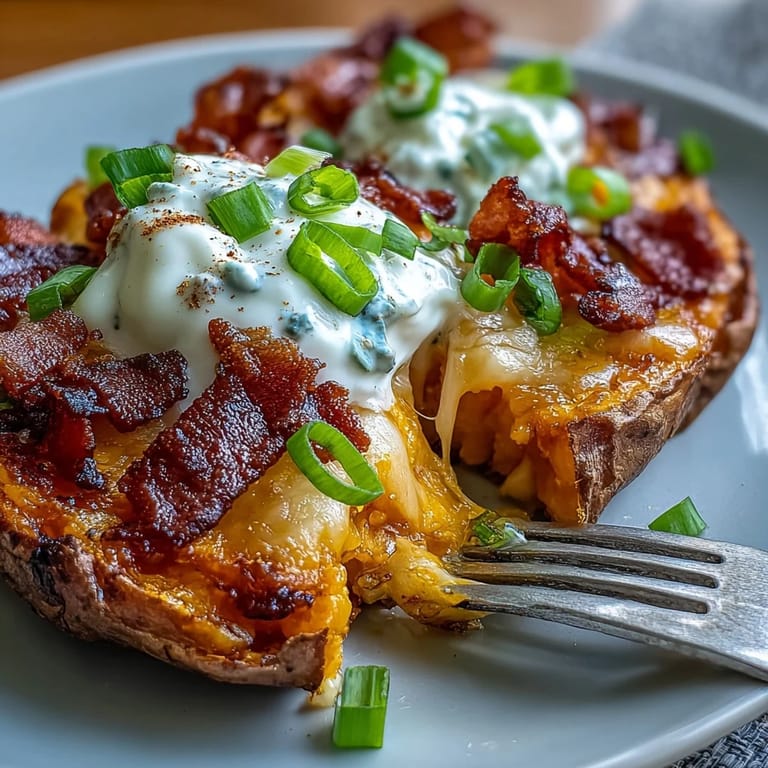
 When I first made loaded sweet potato skins, I was actually trying to clean out my fridge on a lazy Sunday. The smell of bacon sizzling and sharp cheddar melting on those crispy orange shells changed my mind about 'leftover makeovers.' Instead of a last-minute snack, they became something of an occasion. There’s just something completely irresistible about the way smoky, salty, creamy, and sweet all land in a single bite. These skins have come to symbolize the kind of casual fun I like best in the kitchen—no fussy steps, just big flavor.
Last time I pulled these from the oven, the kitchen was buzzing with friends dropping by to watch a game. Someone actually asked if I’d hidden takeout wrappers because they didn’t believe I’d made them. Watching everyone reach for seconds (and thirds) while debating the best way to eat them—knife and fork versus straight from the hand—felt like a tiny victory dance behind the counter.
Ingredients
- Sweet Potatoes: Look for medium ones with smooth skins for perfect hand-held portions—they roast up sweet and sturdy.
- Bacon: Crispy, smoky bacon gives these skins their irresistible salty crunch—cook slow and drain well for the best texture.
- Sharp Cheddar Cheese: Sharpness is key—choose a good block and grate it yourself for melty, full flavor.
- Sour Cream: This cool dollop balances all that warm, melty goodness—full-fat gives the creamiest finish.
- Green Onions: Thin slices add crisp, punchy freshness right at the end—scatter generously.
- Olive Oil: Just a brush crisps the skins beautifully without deep frying.
- Smoked Paprika: This adds subtle complexity and a hint of campfire char—don’t skip it.
- Salt and Pepper: Season both inside and out for layers of flavor in every bite.
- Extra Sour Cream and Green Onions: For that inviting finish, always have more on hand.
Tired of Takeout? 🥡
Get 10 meals you can make faster than delivery arrives. Seriously.
One email. No spam. Unsubscribe anytime.
Instructions
- Start the Oven and Prep the Potatoes:
- Set your oven to 400°F 200°C and line a baking sheet—there’s something about the anticipation when the kitchen begins to warm up. Scrub sweet potatoes, dry them, then prick all over with a fork so steam can escape—rub each with olive oil so the skins crisp up as they roast.
- Bake and Cool the Potatoes:
- Roast the sweet potatoes for about 45–50 minutes until a knife glides in easily; your kitchen will smell sweet and toasty. Let them cool on the counter while you prep your toppings.
- Crisp the Bacon:
- Cook bacon in a skillet over medium heat, listening for that cheerful sizzle until golden and crisp—don’t forget to drain on paper towels for max crunch. Crumble into bite-sized pieces and try not to snack on too many while you wait.
- Hollow the Potatoes:
- Slice each potato in half lengthwise and carefully scoop out most of the flesh, leaving about a 1/4-inch border—you want sturdy boats that won’t collapse. Save the extra potato for mash or a breakfast hash tomorrow.
- Season and Crisp the Skins:
- Brush both inside and outside of the skins with more olive oil, then sprinkle smoked paprika, salt, and pepper everywhere for full coverage. Bake cut side up for 10 minutes so the shells get really crisp and ready to hold the filling.
- Fill and Melt:
- Pack each skin with cheddar and plenty of crumbled bacon, then return to the oven for 8–10 minutes—the cheese should bubble and melt in tempting little puddles. Peek in around the 8-minute mark because the fragrance may be too good to resist.
- Finish and Serve:
- Let the skins cool just a minute, then top generously with sour cream and scatter green onions over every one. Serve right away—preferably while everyone is still hovering in the kitchen.
 Save to Pinterest
 Sharing these skins at a backyard get-together, I remember someone pausing just to savor how the smoky bacon mingled with the sweet flesh and tangy sour cream. That smile—greasy fingertips and all—reminded me how small dishes can create big moments.
Making It Work for Your Crowd
I’ve learned that doubling the recipe barely adds any extra stress, and people are always glad you did. These skins hold up well at room temperature for a bit, so you can relax and actually enjoy the gathering instead of hovering over the oven.
Swaps and Additions to Try
Sometimes I’ll swap the bacon for crispy chickpeas or toss in diced jalapeños for a little heat—always a hit with spice lovers. Swapping cheeses completely changes the flavor profile; Monterey Jack, pepper Jack, or even feta have all worked in a pinch.
Serving and Storing Leftovers
On rare occasions we have leftovers and they reheat best in a hot oven for a few minutes, bringing back the crisp edges. I’ve even packed one or two for a lunchbox treat—minus the sour cream, adding it fresh later.
- If you make ahead, wait to add the sour cream until just before serving.
- Freeze unfilled skins for an even quicker prep next time.
- Always check that the potatoes are cool to handle before scooping—they’ll hold their shape better.
 Save to Pinterest
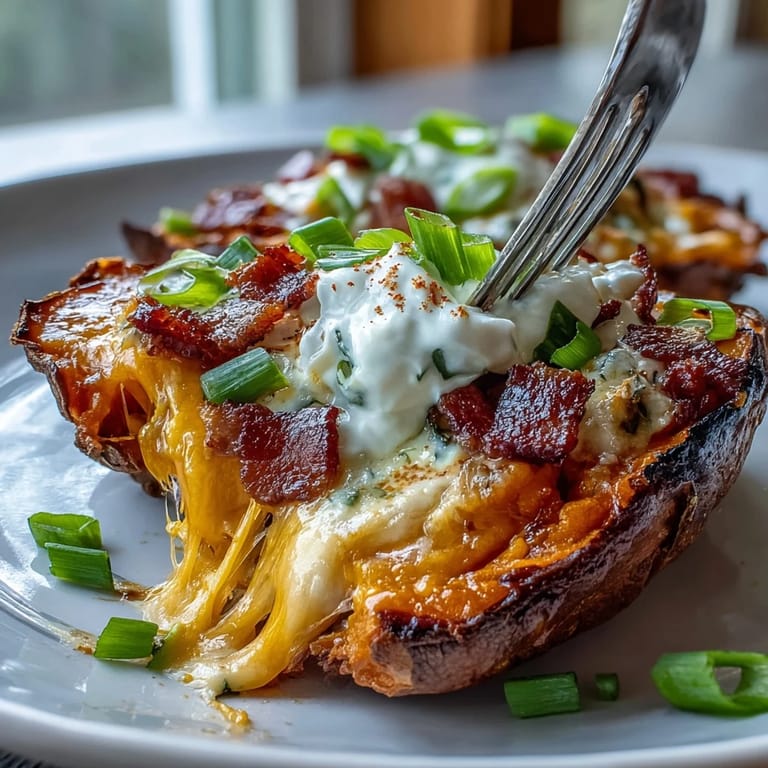
 Every batch of these sweet potato skins disappears faster than I expect. I hope you enjoy making them as much as eating them—finger-licking required.
Recipe FAQs
- → How can I make these without bacon?
Omit the bacon and use crispy chickpeas, sautéed mushrooms, or smoked tofu for a savory vegetarian option. Add a pinch of smoked paprika or liquid smoke to mimic that smoky note.
- → What’s the best way to crisp the skins extra?
After scooping the flesh, brush the inside and outer edges with olive oil and return cut-side up to a hot oven for 8–12 minutes. A short broil at the end for 1–2 minutes will deepen the crispness—watch closely to avoid burning.
- → Can I prepare the skins ahead of time?
Yes. Bake and scoop the skins, then refrigerate uncovered to help keep them dry. Re-crisp in a 400°F oven for 8–10 minutes before filling and completing the bake with cheese and toppings.
- → What cheese substitutes work well?
If you prefer a milder or dairy-free option, try Monterey Jack, pepper jack for heat, or a plant-based shredded cheddar alternative. Make sure any substitute melts well under oven heat.
- → How should leftovers be stored and reheated?
Store cooled leftovers in an airtight container in the fridge for up to 3 days. Reheat on a baking sheet at 350°F until warmed through and the cheese softens—avoid the microwave to preserve crispness.
- → Can these be frozen for later?
You can freeze baked, unfilled skins in a single layer on a tray, then transfer to a bag for up to 2 months. Thaw in the fridge and re-crisp in the oven before filling and finishing with cheese and toppings.