 Save to Pinterest
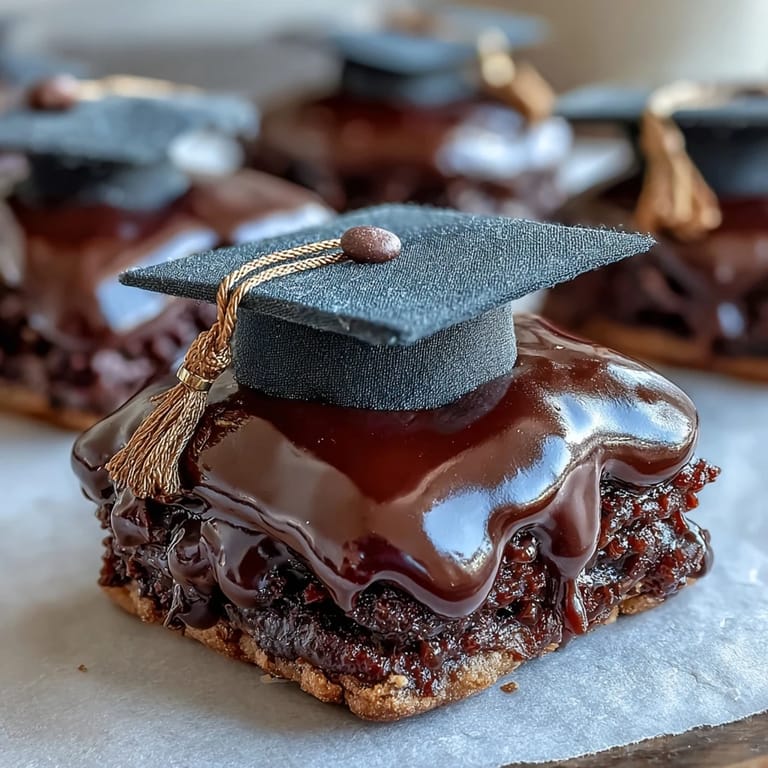
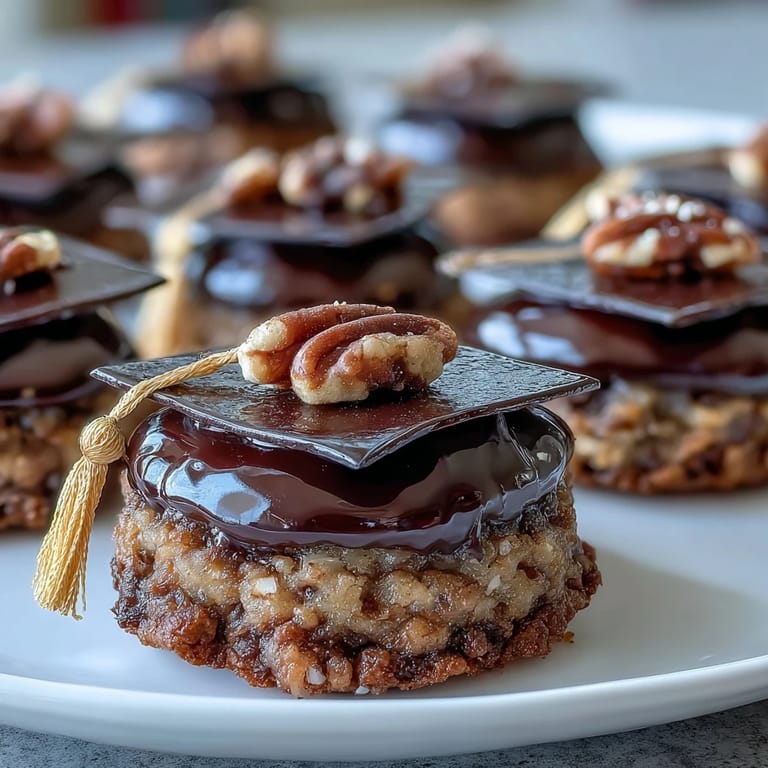
 My cousin texted me three weeks before her graduation asking if I could make cookies for her celebration party, and honestly, I panicked a little. Then I found myself sketching tiny graduation caps on a notepad during my lunch break, imagining how satisfying it would be to turn a simple sugar cookie into something that actually looked like an accomplishment. The black royal icing came to me first—sharp, elegant, professional—and then the little yellow tassel made me smile because it felt like I was decorating actual tiny hats. What started as a nervous favor became an excuse to play with icing and candy in a way that felt surprisingly meaningful.
Watching my cousin's face when she saw the whole box of these sitting on her graduation day table was the moment I realized I'd made the right choice. Her friends started asking for the recipe before dessert was even served, and one person genuinely wanted to commission me for their daughter's graduation next year. That's when I knew these cookies were special—they weren't just food, they were tiny edible celebrations that made people feel seen and celebrated.
Ingredients
- All-purpose flour: The foundation of a crispy, snappy cookie that holds its shape beautifully when you're cutting out those graduation cap designs.
- Unsalted butter: This is where the flavor and texture magic happens, so make sure it's softened to room temperature or your dough will be frustrating to work with.
- Granulated sugar: Creates that satisfying crunch when you bite through the icing into the cookie underneath.
- Large egg: Binds everything together and gives the cookies structure without making them cake-like or dense.
- Vanilla extract: A small detail that makes the whole cookie taste more interesting and intentional.
- Powdered sugar and egg whites: These become your glossy royal icing canvas, and the consistency is everything, so don't rush the beating process.
- Gel food coloring: Use gel, not liquid—it won't thin out your icing the way liquid coloring does, and your black will actually look black instead of murky.
- Mini M&Ms or candy pearls: The tiny detail that transforms your cookies from nice to genuinely delightful, so don't skip this part.
Tired of Takeout? 🥡
Get 10 meals you can make faster than delivery arrives. Seriously.
One email. No spam. Unsubscribe anytime.
Instructions
- Gather and prep your ingredients:
- Read through everything first and set your butter out to soften while you measure your flour. This five-minute head start prevents you from discovering mid-baking that your butter is still cold and rock-hard.
- Whisk your dry ingredients:
- In a medium bowl, whisk together the flour, baking powder, and salt until they're evenly distributed. This step prevents lumps and makes mixing the dough smoother later.
- Cream butter and sugar into fluffy clouds:
- Beat the softened butter and sugar together for about two to three minutes until it looks pale and almost cloud-like in texture. You'll know it's ready when it nearly doubles in volume and the graininess starts to disappear.
- Add your egg and vanilla:
- Crack in the egg, add the vanilla, and mix until everything is combined and creamy. The mixture should look smooth and homogeneous, not separated or streaky.
- Bring the dough together:
- Gradually add your whisked flour mixture, stirring gently until you have a soft dough that just comes together. Stop as soon as you don't see any flour streaks—overworking makes cookies tough.
- Chill strategically:
- Divide the dough in half, flatten each piece into a disk, wrap them in plastic, and refrigerate for thirty minutes. Cold dough is easier to roll and cut, and it bakes more evenly.
- Preheat and roll:
- Get your oven heating to 350°F while you dust your work surface with a little flour and roll one dough disk to about a quarter-inch thickness. If the dough gets too warm and sticky, pop it back in the fridge for five minutes.
- Cut and place:
- Use your graduation cap or square cookie cutter to cut out shapes and transfer them carefully to parchment-lined baking sheets, spacing them about an inch apart. Don't overcrowd them or they'll bake unevenly.
- Bake until golden at the edges:
- Slide them into the oven for eight to ten minutes, watching until the edges turn just golden but the centers still look slightly underdone. They continue cooking as they cool, so don't wait for them to look fully baked or you'll end up with hard cookies.
- Cool completely:
- Let the cookies sit on the baking sheet for a few minutes, then transfer them to a wire rack to cool all the way down. Warm cookies are fragile and will stick to the icing.
- Make your royal icing base:
- In a clean bowl, beat your egg whites (or meringue powder mixed with water) until foamy, then gradually add sifted powdered sugar while beating continuously. This takes patience, but you want stiff, glossy peaks that hold their shape.
- Divide and color:
- Once your icing is ready, tint most of it black with gel food coloring for the graduation caps, and set aside a smaller portion to color yellow for the tassels. Gel color blends smoothly without thinning out your icing.
- Adjust your icing consistency:
- Make two batches—one slightly thinner for flooding (add water by the teaspoon) and one stiffer for piping details. Think of flooding consistency as thick cream and piping consistency as peanut butter.
- Outline and flood:
- Using your thinner black icing, outline each cookie with a piping bag, then fill the middle by letting the icing flow gently or using a toothpick to spread it to the edges. Let this set for thirty to sixty minutes until it's completely dry to the touch.
- Pipe your tassels:
- Fill a piping bag with the yellow icing and pipe a small dot and tassel line on each cap where you'd expect to see one on a real graduation cap. The details don't need to be perfect—they just need to feel intentional.
- Add your candy crowns:
- Press a mini M&M or candy pearl at the end of each tassel for that final pop of color and dimension. Let everything dry fully for several hours or overnight before serving or packaging.
 Save to Pinterest
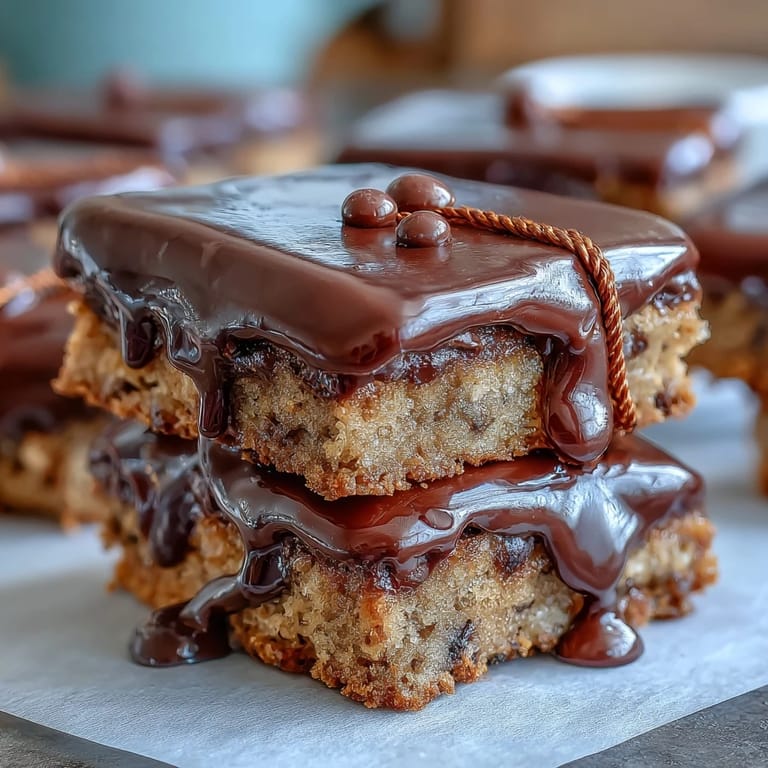
 I made these cookies again the following month for a friend's kid's kindergarten graduation, and watching a five-year-old's eyes light up when they realized the cookie was shaped like a graduation cap reminded me why these little details matter. Food doesn't have to be complicated to feel special—sometimes it just needs to celebrate the people eating it.
Make-Ahead Strategy
The beauty of these cookies is that you can spread the work across a few days without any stress. Bake the cookies up to two days in advance, store them in an airtight container, and decorate them the day before your event for the freshest-looking icing. This approach also means you're not standing in your kitchen at midnight piping icing when you should be sleeping.
Customizing Your Design
Once you nail the basic black cap and yellow tassel, you can get creative with the details. Some people add initials or graduation years in white icing, others use different color combinations to match school colors, and one person I know made them in pastels for a soft, elegant look. The structure stays the same—outline, flood, decorate—but your imagination is the only real limit here.
Storing and Serving
These cookies stay crispy for about five days in an airtight container at room temperature, though they're honestly best in the first two or three days when the contrast between the crispy cookie and smooth icing feels most satisfying. If you're packaging them as gifts, layer them between parchment paper to prevent the decorated side from sticking to other cookies.
- Keep decorated cookies away from humidity by storing them in a cool, dry place, never in the refrigerator where condensation will soften them.
- If you're mailing them, place each cookie in its own small box or wrap them individually to protect the icing from damage during shipping.
- These freeze beautifully for up to a month if you need to make them further in advance, though the icing might need a gentle touch-up with a tiny brush if it cracks slightly during thawing.
 Save to Pinterest
 Every graduation, promotion, or milestone celebration deserves a little edible magic, and these cookies are exactly that. They're simple enough for anyone to make but special enough that people will remember eating them alongside their memories of the day.
Recipe FAQs
- → What makes the cookies crisp and buttery?
The blend of softened unsalted butter and granulated sugar creamed together creates a tender, buttery texture. Proper chilling of the dough and precise baking time ensure a crisp edge.
- → How do I achieve smooth royal icing for decoration?
Beating egg whites or meringue powder with powdered sugar until stiff peaks form creates a glossy, smooth consistency, perfect for outlining and flooding the cookies.
- → What colors are used for the icing details?
Black gel food coloring is used for the cap’s main surface, while yellow gel coloring highlights tassels and buttons, achieving a realistic graduation cap appearance.
- → Can I prepare these in advance?
Yes, the cookies can be baked up to two days ahead and decorated the following day for best results and freshness.
- → What tools are useful for decorating?
Small piping bags, toothpicks, and a square or graduation cap cookie cutter help in shaping and detailing the cookies cleanly.