Save to Pinterest
 My neighbor knocked on my door one evening with a question about what to make for her teenage son's friends, and I suggested honey garlic chicken because it's the kind of dish that makes people pause mid-bite and ask for the recipe. She came back the next week saying her kitchen smelled incredible and everyone cleaned their plates, which is the highest compliment I know. That moment stuck with me because it reminded me why I keep coming back to this glaze—it's impossibly easy to make but tastes like you spent hours perfecting it.
I made this on a Tuesday night when I had exactly thirty-five minutes before dinner needed to be on the table, and my partner walked in halfway through, drawn by the smell of garlic and caramelizing honey. He hovered by the stove asking questions until I handed him a wooden spoon to help baste, and that's when I realized this recipe works because it brings people into the kitchen naturally, even when they didn't plan to be there.
Ingredients
- Chicken thighs: Bone-in, skin-on thighs are your secret weapon because the skin crisps beautifully and the bones keep the meat juicy, unlike breasts which can dry out if you're not careful.
- Honey: This is your sweetness and your glaze builder, so use something decent—it doesn't have to be expensive, just avoid anything crystallized or past its prime.
- Soy sauce: Low sodium lets you taste the garlic and honey without the glaze becoming too salty, and it's worth the small effort to find.
- Garlic: Minced fresh garlic becomes sweet and mellow when cooked in the glaze, nothing like the harsh bite of jarred, so take the thirty seconds to mince it yourself.
- Rice vinegar or apple cider vinegar: Just a tablespoon cuts through the sweetness and gives the glaze brightness, preventing it from tasting one-dimensional.
- Olive oil: You need this for searing to get that golden crust that locks in moisture and adds depth.
- Red pepper flakes: Optional but worth it if you like a subtle heat that builds quietly rather than shouting.
- Fresh parsley or green onions: These brighten everything at the end and remind you that this is a complete, thoughtful dish.
- Sesame seeds: Toasted ones add a nutty whisper and visual appeal, though they're truly optional.
Tired of Takeout? 🥡
Get 10 meals you can make faster than delivery arrives. Seriously.
One email. No spam. Unsubscribe anytime.
Instructions
- Start your oven and prep:
- Preheat to 400°F while you pat your chicken dry—this step matters because moisture is the enemy of crispy skin, so don't skip it even though it feels small. Season generously with salt and pepper on both sides.
- Sear the chicken:
- Heat olive oil in your oven-safe skillet over medium-high heat until it shimmers, then lay chicken thighs skin side down and listen for that satisfying sizzle. Let them sit undisturbed for three to four minutes until the skin turns a deep golden brown, then flip and cook the other side for two minutes before removing to a clean plate.
- Build the glaze:
- In that same skillet with all those browned bits still clinging to the bottom, add minced garlic and let it sizzle for thirty seconds until your kitchen fills with that toasted garlic smell. Pour in honey, soy sauce, vinegar, water, and red pepper flakes if using, and stir everything together until it comes to a gentle simmer.
- Combine and glaze:
- Return the chicken to the skillet skin side up, then use a spoon or brush to coat each thigh with the glaze, making sure some pools underneath. This is important because the glaze will reduce and concentrate in the oven, coating everything in sticky, caramelized goodness.
- Bake until perfect:
- Transfer the whole skillet to the oven and set a timer for eighteen to twenty-two minutes, then pull it out halfway through to baste the chicken with the glaze that's been bubbling away. The chicken is done when an instant-read thermometer hits 165°F in the thickest part of the thigh and the skin looks deep mahogany.
- Rest and serve:
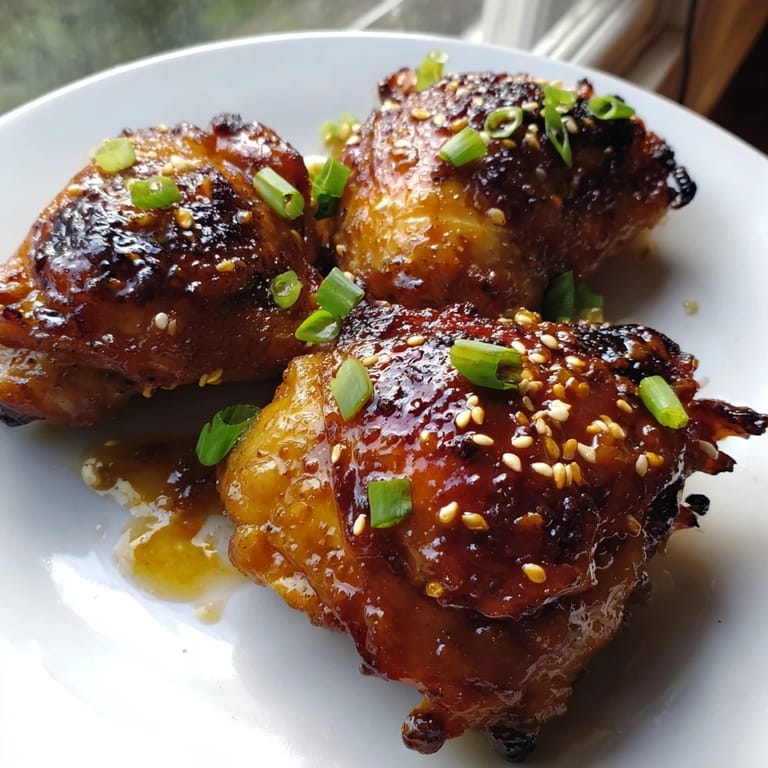
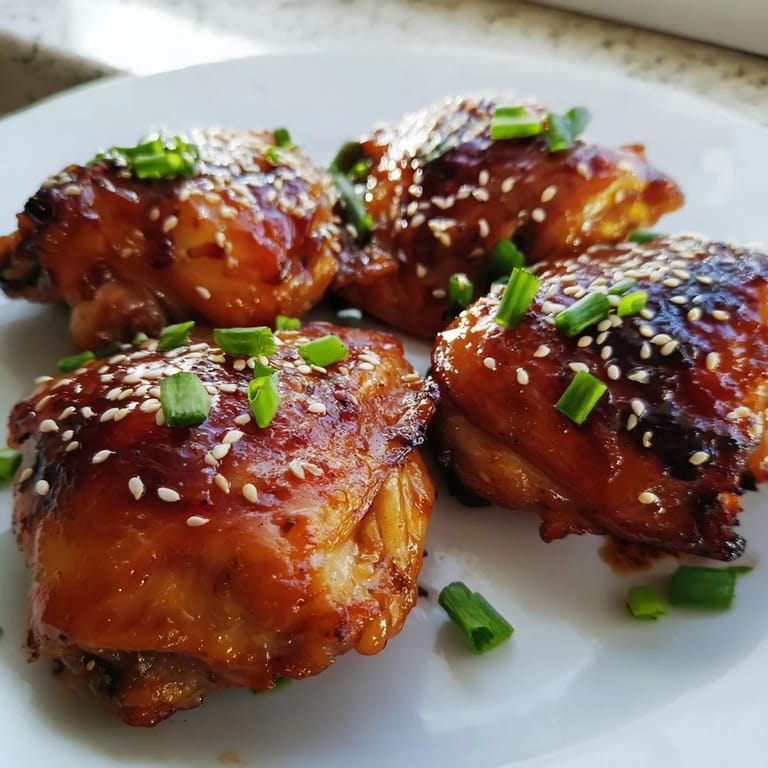
- Let the chicken rest in the pan for five minutes so the juices redistribute and everything stays tender when you cut into it. Scatter fresh herbs and sesame seeds over the top, and serve immediately while the glaze is still glossy.
 Save to Pinterest
 Last month I made this for my parents, and my dad, who is not one for compliments in the kitchen, asked for seconds and wanted to know exactly what I did differently than usual. It wasn't fancy or complicated, but somehow that glaze and those caramelized edges made him feel like I'd spent all day on dinner, when really I'd just understood how to let simple ingredients do their job.
Why Chicken Thighs Win
Chicken breasts are forgiving for some recipes, but thighs are where this dish shines because they have more fat running through them, which means they stay juicy even if you're not timing things perfectly. The skin crisps in a way that white meat just can't match, and that contrast between crispy exterior and tender interior is what makes people ask for your recipe. I've tried this with boneless thighs on nights when I'm lazy about prep, and while it works, you lose that beautiful caramelized skin that makes you feel like you're eating something special.
The Glaze Science
The magic happens when honey, garlic, and soy sauce come together in heat—the honey caramelizes and becomes glossy, the garlic mellows from harsh to sweet, and the soy sauce adds umami that makes everything taste richer than the sum of its parts. The vinegar is there as a silent partner, just enough to keep things from tasting cloying, and the water helps the glaze reduce evenly without burning. I learned this by making it once without the vinegar and realizing halfway through that the glaze felt flat, like it was missing a conversation partner for all that sweetness.
Timing and Temperature
The thirty-five-minute total time is real and achievable, but it depends on your oven running true and your chicken thighs being roughly the same size so they cook evenly. If you like extra-crispy skin, broil the whole thing for two to three minutes at the very end, but watch it carefully because honey burns fast and you want caramel, not charcoal. I usually have rice going in a separate pot and vegetables in a wok so everything comes together at once, turning this into a complete meal that feels coordinated even though I'm juggling three things.
- If your thighs are particularly large, add another five minutes to the baking time to ensure the meat reaches 165°F safely.
- A basting brush makes coating the chicken easier, but a spoon works just fine if that's what you have.
- Letting the chicken rest after baking might feel like wasted time, but it genuinely keeps everything juicier when you serve it.
 Save to Pinterest
 There's something deeply satisfying about a dish that tastes like you know what you're doing but requires almost no advanced technique, and this chicken has become that for me. It's the kind of thing I make when I want to feel capable in the kitchen without spending the whole evening there.
Recipe FAQs
- → Can I use chicken breasts instead of thighs?
Yes, boneless chicken breasts work well. Reduce the baking time by 5-7 minutes since they cook faster than thighs. Monitor internal temperature to ensure it reaches 165°F without drying out.
- → How do I get extra-crispy skin?
After the baking time is complete, increase your oven to broil setting and place the skillet under the broiler for 2-3 minutes. Watch carefully to prevent burning while achieving that perfectly crispy, caramelized exterior.
- → What can I serve alongside this dish?
Steamed jasmine or white rice pairs beautifully with the glaze. Add stir-fried vegetables like broccoli, snap peas, or bok choy for a complete balanced meal with fresh flavors.
- → Is this gluten-free?
Regular soy sauce contains gluten. To make it gluten-free, substitute with tamari or certified gluten-free soy sauce. Always verify that other sauces and ingredients meet your dietary requirements.
- → How should I store and reheat leftovers?
Store cooled chicken in an airtight container in the refrigerator for up to 3 days. Reheat gently in a 350°F oven for 10-12 minutes or in a skillet over medium heat with a splash of water to maintain moisture.
- → Can I make the glaze ahead of time?
Absolutely. Combine honey, soy sauce, garlic, vinegar, and water in a bowl and refrigerate for up to 24 hours. This allows flavors to meld. Simply reheat before cooking and proceed with the searing step.