Save to Pinterest
 My kitchen countertop overflowing with vegetable scraps led to an accidental discovery that changed my cooking forever. The vibrant colors of carrot peels, the translucent layers of onion skins, and the forest-green celery tops seemed too precious to waste. That afternoon, with nothing but a stockpot and intuition, I transformed what would have been compost into liquid gold. The aroma that filled my apartment that day was so enveloping that my neighbor knocked on my door asking what magical thing I was creating.
Last winter during a particularly fierce snowstorm, I found myself housebound with little in the pantry except rice and a freezer container of this very broth. As the wind howled outside, I simmered rice in the golden liquid, adding a pinch of salt and a drizzle of olive oil. My partner still talks about that simple risotto as one of the best things I've ever made, proving that sometimes limitations create the most memorable meals.
Ingredients
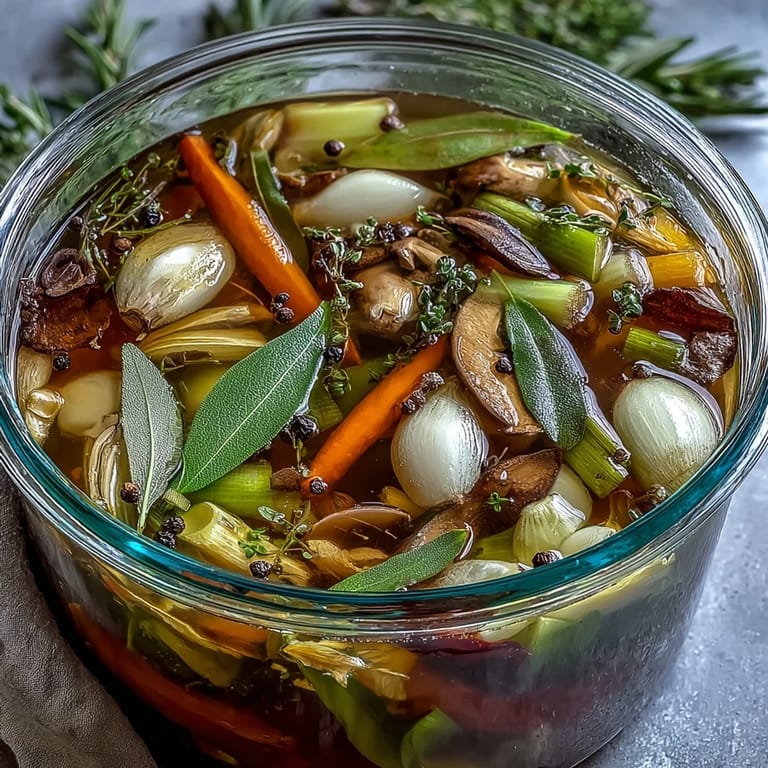
- 4 cups vegetable scraps: The beauty lies in the variety, so save those carrot tops, onion ends, and mushroom stems in a freezer bag until you have enough for a batch.
- Bay leaf and peppercorns: These quiet heroes provide a foundational flavor that supports rather than overpowers the vegetables.
- Cold water: Always start with cold water as it extracts flavor more gradually and completely than hot water ever could.
- Fresh herbs (optional): A sprig of thyme or parsley stems can transform your broth into something that smells like a professional kitchen.
Tired of Takeout? 🥡
Get 10 meals you can make faster than delivery arrives. Seriously.
One email. No spam. Unsubscribe anytime.
Instructions
- Gather your scraps:
- Start collecting clean vegetable trimmings in a freezer bag, adding to it whenever you cook. You'll want to avoid brassicas like broccoli or cabbage that can make your broth bitter.
- Build your flavor base:
- Place all your colorful scraps, bay leaf, peppercorns and optional aromatics in a large pot. Cover completely with cold water and watch as the colors begin to meld.
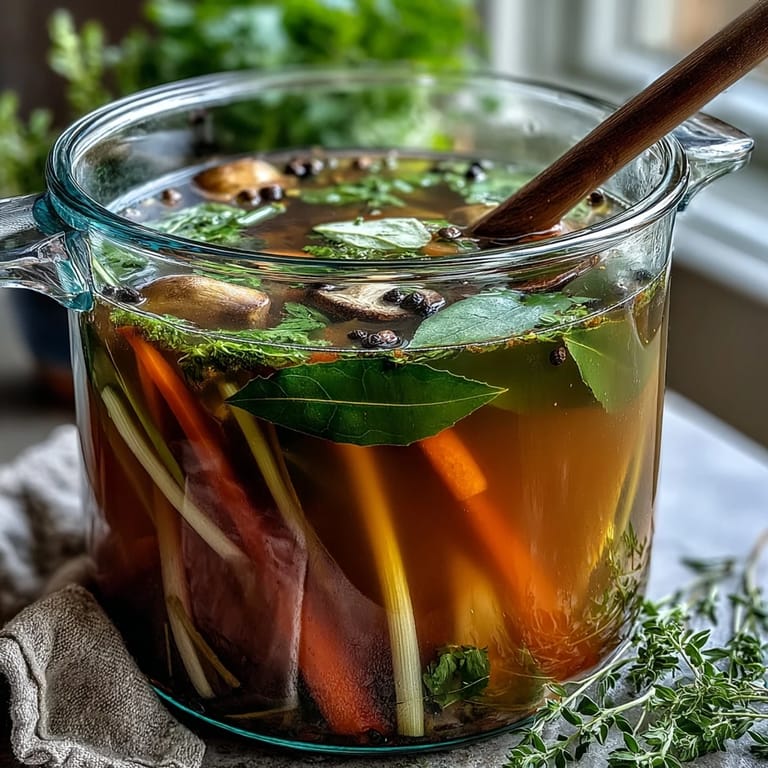
- The gentle simmer:
- Bring everything to a boil, then immediately reduce to a whisper of a simmer. You want tiny bubbles barely breaking the surface, not a rolling boil that can cloud your broth.
- Practice patience:
- Let everything mingle and dance for 45-60 minutes, occasionally skimming any foam that rises to the surface. Your kitchen will fill with an aroma that makes waiting worthwhile.
- Strain and store:
- Pour through a fine-mesh sieve, watching the clear amber liquid collect below. Let cool completely before refrigerating for up to 5 days or freezing in portions for future cooking adventures.
 Save to Pinterest
 One particularly hectic holiday season, I gifted small jars of this concentrated broth to friends with handwritten tags suggesting uses. Months later, my friend Sarah called to say she'd used her last precious tablespoon to finish a risotto for a dinner party that earned her more compliments than anything else she'd served. In that moment, I realized this humble broth had become something I was known for, a signature offering from my kitchen to others.
Roasting for Deeper Flavor
On days when I crave a more intense broth, I spread the vegetable scraps on a baking sheet and roast them at 400°F for about 20 minutes before adding them to the pot. The caramelization creates notes of sweetness and complexity that transform the finished broth into something that can stand alone as a sipping broth with just a whisper of salt. The kitchen fills with an almost bread-like aroma as the natural sugars in the vegetables brown and develop.
Seasonal Variations
Each season brings its own character to this broth. Spring versions with asparagus ends and young herb stems have a bright, almost grassy quality. Summer yields tomato scraps and corn cobs that create a sweeter profile. Fall brings mushroom stems and leek tops for earthiness, while winter root vegetable trimmings provide a hearty backbone. I've come to recognize these subtle shifts as a calendar of flavor in my kitchen.
Beyond the Basics
This humble broth has become my secret kitchen currency, enriching everything it touches far beyond what you might expect from scraps. I keep it in ice cube trays for when I need just a splash of flavor in a pan sauce or to deglaze after searing vegetables.
- Freeze in silicon muffin cups for perfect 1/3 cup portions that are ideal for cooking grains.
- Reduce the strained broth by half for a more concentrated flavor bomb that takes up less freezer space.
- Label your containers with the dominant vegetables used, as each batch will have its own unique character worth noting.
 Save to Pinterest
 Making this broth has become a kitchen ritual that marks the changing seasons and reminds me that true nourishment often comes from what we might otherwise overlook. Each batch tells the story of meals past while creating possibilities for those to come.
Recipe FAQs
- → What vegetables should I avoid putting in my broth?
Skip potato peels and brassicas like broccoli, cauliflower, and cabbage as they can make your broth bitter or cloudy. Stick with carrot peels, onion skins, celery ends, leek tops, mushroom stems, and herb stems for the cleanest flavor.
- → How long does this broth stay fresh?
Your homemade broth will keep refrigerated for up to 5 days in airtight containers. For longer storage, freeze it for up to 3 months. Consider freezing in ice cube trays for easy portioning when you just need a small amount.
- → Can I make this broth more flavorful?
Absolutely! Roast your vegetable scraps at 200°C (400°F) for 20 minutes before simmering to develop deeper, caramelized notes. Adding kombu seaweed or dried mushrooms also introduces extra umami richness to the finished broth.
- → Should I add salt while making the broth?
It's best to add little to no salt during the cooking process, especially if you plan to use the broth in other dishes. This gives you complete control over the final seasoning when you actually cook with it. Salt lightly only if enjoying it as a sipping broth.
- → What's the best way to store vegetable scraps until I have enough?
Keep a large container or resealable bag in your freezer and add trimmings as you prepare meals throughout the week. Freezing not only preserves freshness but also breaks down cell walls, potentially extracting even more flavor during simmering.