 Save to Pinterest
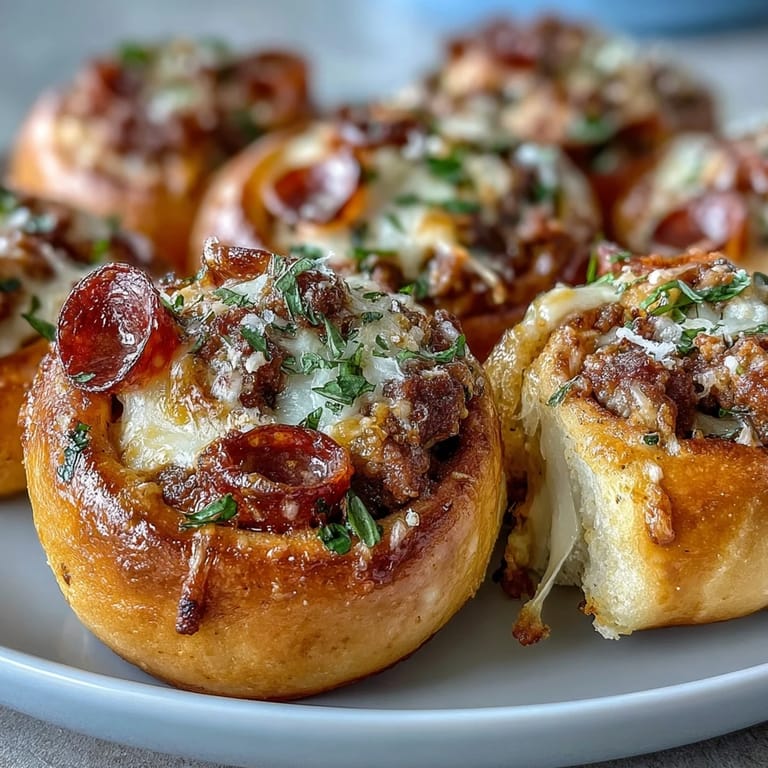
 There's something oddly satisfying about pulling a tray of golden, bubbling pizza rolls out of the oven on a random Tuesday night. I wasn't planning to reinvent anything—just wanted something quick that didn't feel like another sad desk lunch. The dough came together faster than I expected, and suddenly my kitchen smelled like a pizzeria. When I bit into the first one, still too hot and trailing cheese, I realized I'd accidentally made something I'd actually crave again.
I made these for a potluck once, mostly because I didn't trust myself with a casserole. People kept asking if I'd ordered them from somewhere, which felt like the highest compliment. One friend, who usually avoids carbs like they're cursed, ate four and texted me the next day for the recipe. That's when I knew these weren't just convenient—they were actually good.
Ingredients
- Plain Greek yogurt: This is what makes the dough soft and protein-rich without needing yeast or waiting around; use full-fat if you want extra tenderness, but nonfat works perfectly fine.
- Self-rising flour: The magic behind the dough's lift and chew; if you don't have it, the homemade version with baking powder is just as reliable.
- Egg: Binds everything together and adds a slight richness that keeps the dough from feeling too lean.
- Lean ground beef: Brings savory depth without greasy guilt; I've used ground turkey before and honestly couldn't tell the difference once it was seasoned.
- Turkey or beef pepperoni: The classic pizza flavor everyone recognizes, and using turkey keeps the fat down while still delivering that spicy, salty kick.
- Part-skim mozzarella: Melts beautifully and stretches when you pull the rolls apart, which is half the fun of eating them.
- Pizza sauce: Just enough to keep things moist and tangy without turning the rolls soggy; I've used marinara in a pinch and it worked fine.
- Parmesan cheese: A little sprinkle on top before baking creates a crispy, salty crust that makes each bite feel a little fancy.
Tired of Takeout? 🥡
Get 10 meals you can make faster than delivery arrives. Seriously.
One email. No spam. Unsubscribe anytime.
Instructions
- Get the oven ready:
- Preheat to 400°F and line a baking sheet with parchment so nothing sticks. This step sounds boring but it saves you from scraping cheese off the pan later.
- Brown the beef:
- Cook it over medium heat, breaking it into small crumbles, until no pink remains—about five minutes. Drain any fat, toss in the pepper and herbs, then let it cool a bit so it doesn't melt the dough.
- Mix the dough:
- Combine yogurt, flour, egg, garlic powder, and salt in a big bowl until it looks shaggy and sticky. Turn it out onto a floured counter and knead for a couple minutes until it smooths out and stops fighting you.
- Roll it out:
- Shape the dough into a rectangle roughly 12 by 10 inches; it doesn't have to be perfect, just even enough that the rolls bake at the same rate.
- Spread the sauce:
- Smear pizza sauce all over, leaving a small border so it doesn't ooze out the sides when you roll it up.
- Add the filling:
- Scatter the cooked beef, pepperoni, and mozzarella evenly across the sauce. Don't overthink it—just make sure every future slice gets a little of everything.
- Roll it up:
- Starting from the long edge, roll the dough into a tight log like you're making cinnamon rolls. Tighter is better so the filling stays put.
- Slice into rolls:
- Cut the log into 12 equal pieces with a sharp knife; if they look a little messy, that's normal and they'll puff up and hide it in the oven.
- Prep for baking:
- Place the rolls cut-side up on the baking sheet, brush with olive oil, and sprinkle Parmesan and herbs on top.
- Bake until golden:
- Let them go for 18 to 22 minutes, until the tops are browned and the cheese is bubbling out the sides. Cool them for a minute before you dive in, or you'll burn your mouth like I always do.
 Save to Pinterest
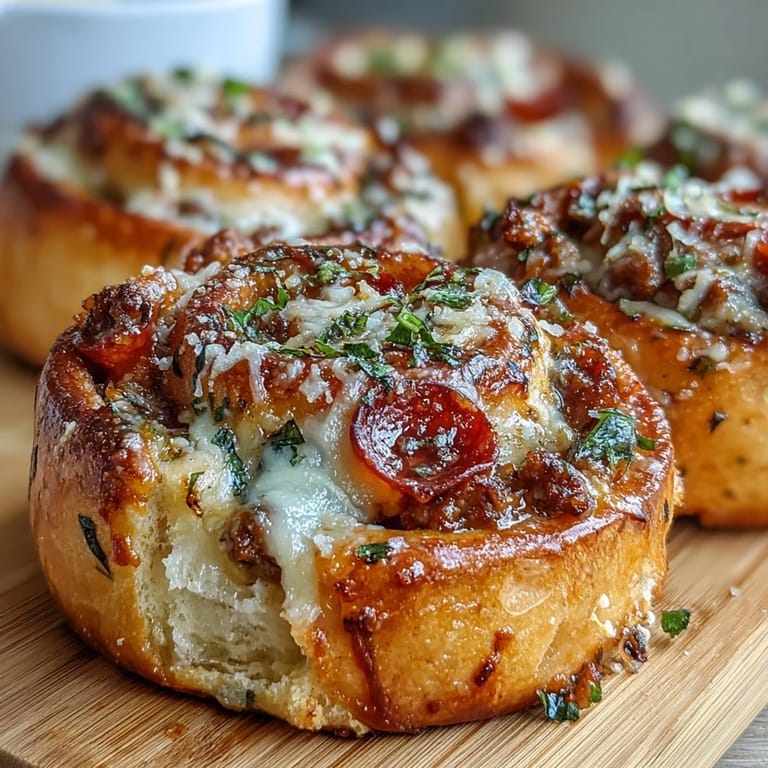
 The first time I packed these for lunch, a coworker leaned over and asked if I was eating pizza for breakfast. Technically it was 11 a.m., but yes. They've since become my answer to meal prep burnout—something I actually look forward to reheating instead of just tolerating. There's a quiet pride in pulling one out of the freezer on a chaotic morning and knowing I set myself up weeks ago.
How to Store and Reheat
These keep in the fridge for up to four days in an airtight container, and they reheat beautifully in the oven or even the microwave if you're in a rush. For longer storage, freeze them in a single layer on a tray first, then transfer to a freezer bag once solid—that way they don't stick together. When you're ready, bake straight from frozen at 350°F for about 12 minutes, and they taste like you just made them.
Swaps and Customizations
Ground turkey or chicken works just as well as beef, and I've even tried crumbled Italian sausage when I wanted something a little richer. If you're not into pepperoni, diced ham or cooked bacon bits bring the same salty, savory energy. Vegetarians can skip the meat entirely and load up on sautéed mushrooms, bell peppers, or spinach—just make sure to squeeze out any extra moisture so the dough doesn't get soggy.
Serving Suggestions
I usually serve these with a little bowl of warm marinara or ranch for dipping, which makes them feel more like an event than a snack. They're great alongside a simple salad or some roasted veggies if you want to round out the meal. Honestly though, they're filling enough on their own that I've eaten three with a sparkling water and called it dinner more times than I'd like to admit.
- Pair with a crisp green salad dressed in lemon vinaigrette for balance.
- Serve with extra pizza sauce, garlic butter, or ranch for dipping.
- Pack them cold for lunch and reheat at work—they travel beautifully.
 Save to Pinterest
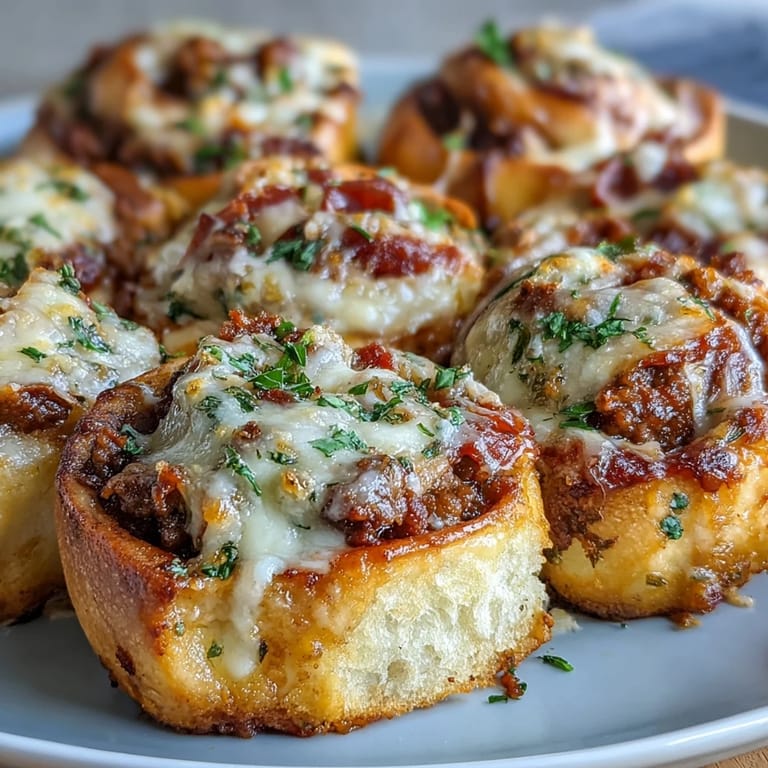
 These rolls have become my go-to whenever I need something that feels indulgent but still fits into the day without regret. They're proof that high-protein doesn't have to mean high-effort or low-flavor—just a little creativity and a willingness to roll with it.
Recipe FAQs
- → Can I freeze these pizza rolls?
Yes, these freeze exceptionally well. Once cooled completely, place in an airtight container or freezer bag for up to 3 months. Reheat directly from frozen at 350°F for 10–12 minutes until heated through.
- → What makes the dough protein-rich?
The combination of Greek yogurt (2 cups) and self-rising flour creates a dough with approximately 14g protein per roll. The egg and cheese fillings add additional protein, making each roll a substantial protein source.
- → Can I make this dough without self-rising flour?
Absolutely. Mix 2 cups all-purpose flour with 3 teaspoons baking powder and ½ teaspoon salt. This homemade substitute works identically to store-bought self-rising flour in this application.
- → How do I prevent the filling from leaking during baking?
Leave a ½-inch border when spreading sauce, roll tightly from the long edge, and place rolls cut-side up on the baking sheet. The yogurt dough becomes sticky when kneaded, helping seal the edges naturally.
- → What meat alternatives work in this filling?
Lean ground turkey or chicken can replace the beef entirely. For vegetarian options, use crumbled plant-based sausage or additional vegetables like bell peppers, spinach, and mushrooms with extra cheese.
- → Why is my dough too sticky to handle?
This is normal for yogurt dough. Lightly flour your hands and work surface. Knead for 2–3 minutes—the dough will smooth out and become more manageable as the gluten develops and flour absorbs moisture.